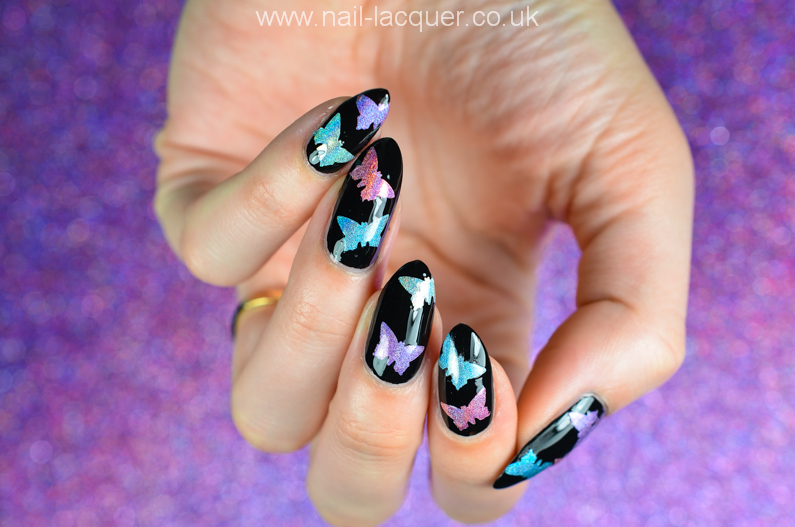
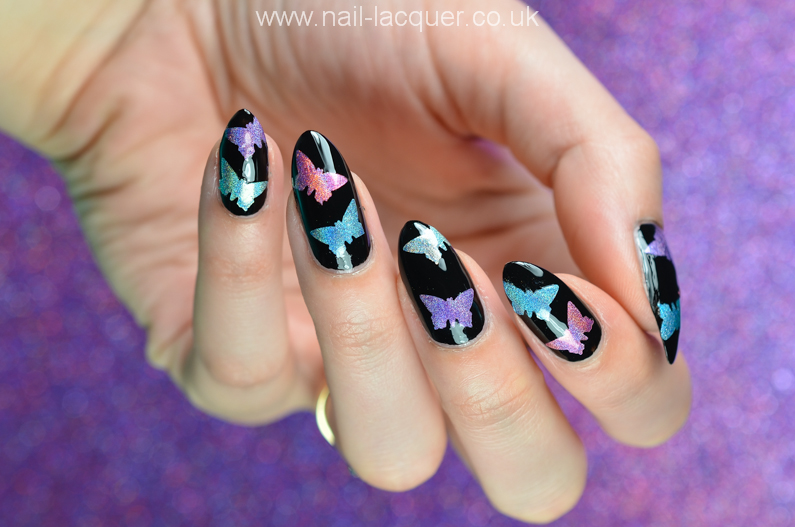
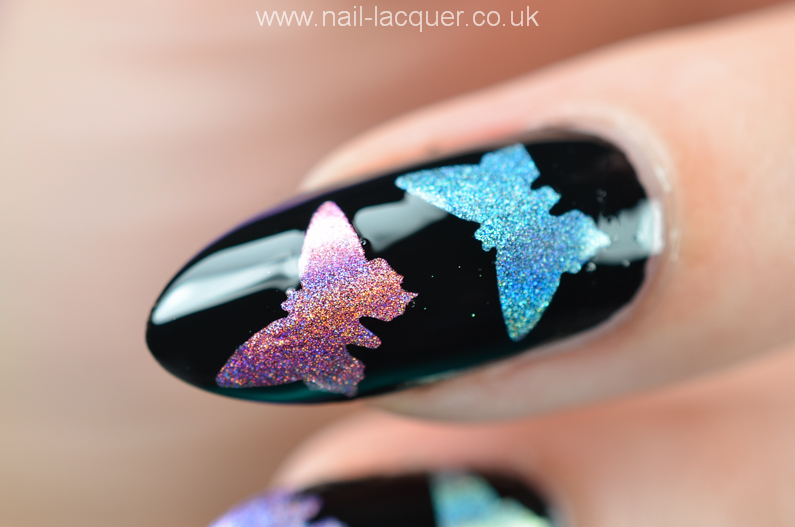
Hello! It’s been a while since I last uploaded a tutorial but I got a fun idea the other day and created the holographic butterfly nail decals tutorial based on that idea.
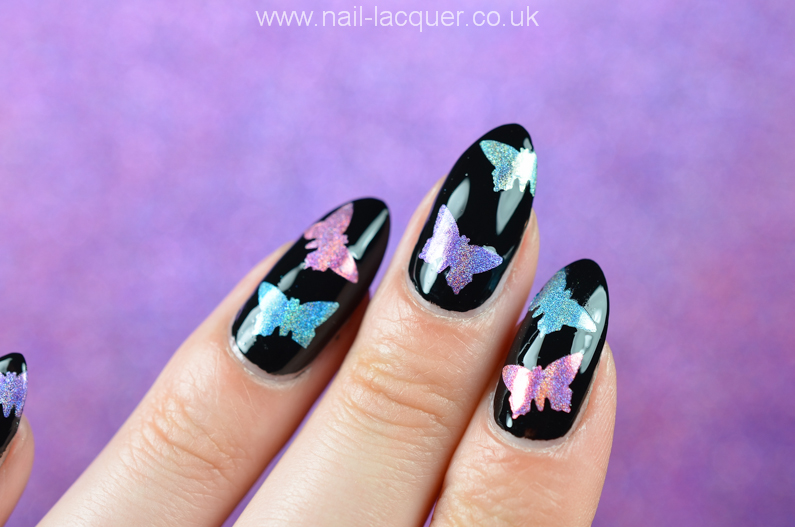
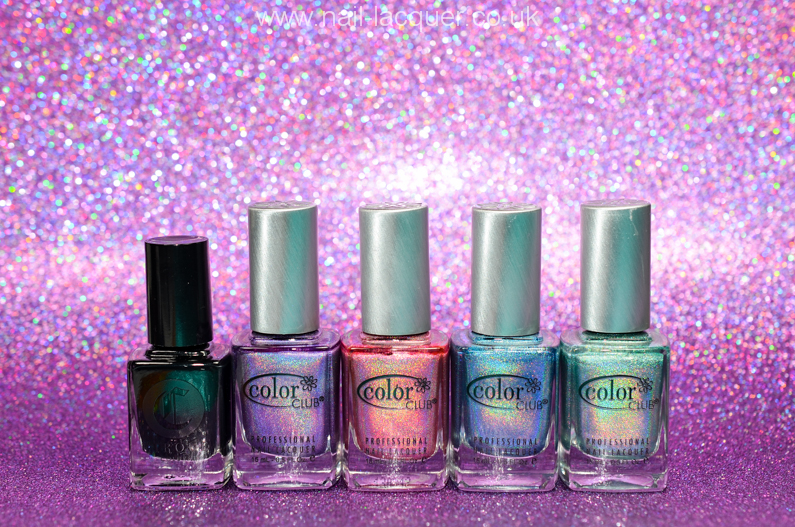
For the look I used Cirque Colors Memento Mori (swatched here) as a base and Color Club Eternal Beauty, Miss Bliss, Over the Moon and Angel Kiss for the butterflies.
A vital item for the butterflies was a butterfly shaped hole punch which I got from Hobbycraft. I also used non-stick paper and top coat.
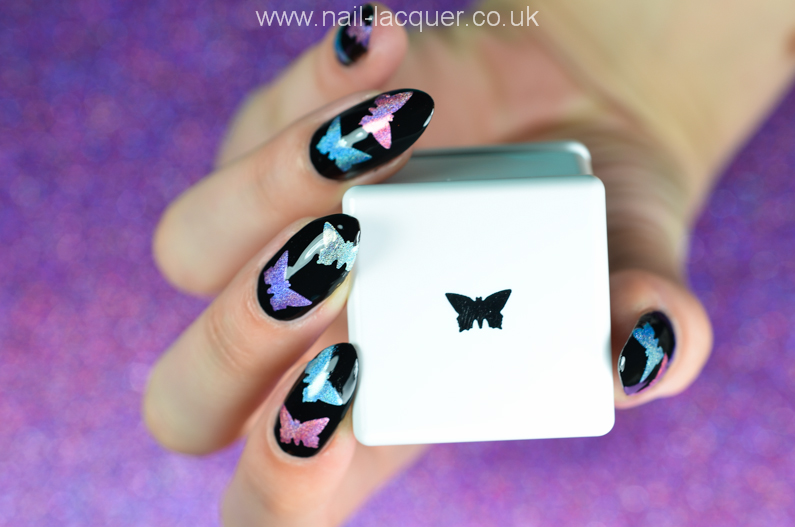
To create this look I first applied two coats of holographic polish on a non-stick paper and topped it all with top coat. While it was drying I applied back polish on my own nails. I then cut out holographic butterflies using the paper punch. I applied one coat of top coat and placed the butterfly decals in the wet layer using tweezers. I then topped it all up with another layer of top coat.
You can also check out the video below to see how it all went down…
I think that’s a great nail art solution for people who can’t be bothered to stamp or freehand but want detailed patterns on their nails. Buying a hole puncher is saving money in long run because you can use it over and over which you can’t with water decals or nail vinyl’s.
I hope you liked my Holographic butterfly nail decals tutorial! xxx